
- Published on
「Spring Boot API 開發:從 0 到 1」Day 17 Spring Boot 與 H2 資料庫

在開發過程中,我們經常需要一個輕量級的資料庫來快速驗證想法或進行原型開發
在 Java 的 solution 裡面,經常使用 H2 來做為這樣子的資料庫
讓我們來深入了解 H2 資料庫,以及如何在 Spring Boot 中使用它
其它語言比較常用的輕量資料庫大多是 SQLite 比較多
H2 資料庫簡介
H2 是一個用 Java 編寫的關聯型資料庫,它具有以下優點
- 輕量級:H2 的 JAR 檔案僅約 2MB,啟動速度快
- 嵌入式:可以直接嵌入到 Java 應用程式中,無需單獨安裝
- 兼容性:支持標準 SQL,兼容多種資料庫模式
- 速度快:在記憶體模式下性能極高
- 支持持久化:可以選擇將資料保存到實體檔案
- 瀏覽器控制台:提供基於 Web 的管理界面
H2 的運行模式
H2 資料庫支持多種運行模式
- 嵌入式模式(Embedded):資料庫直接嵌入到應用程式中,資料儲存在記憶體或檔案中
- 服務器模式(Server):H2 作為獨立的資料庫服務器運行,可以通過網絡連接
- 記憶體模式(In-memory):資料僅儲存在記憶體中,應用程式關閉後資料就會不見,比較適合測試場景
Spring Boot 中使用 H2 和 JDBC API
增加依賴
對於一些常用的 starter,可以直接用 IDE 在 build.gradle 提供的功能 Edit Starters,直接在視窗裡面勾選添加就好了
這個視窗和一開始建立專案時的視窗是一樣的
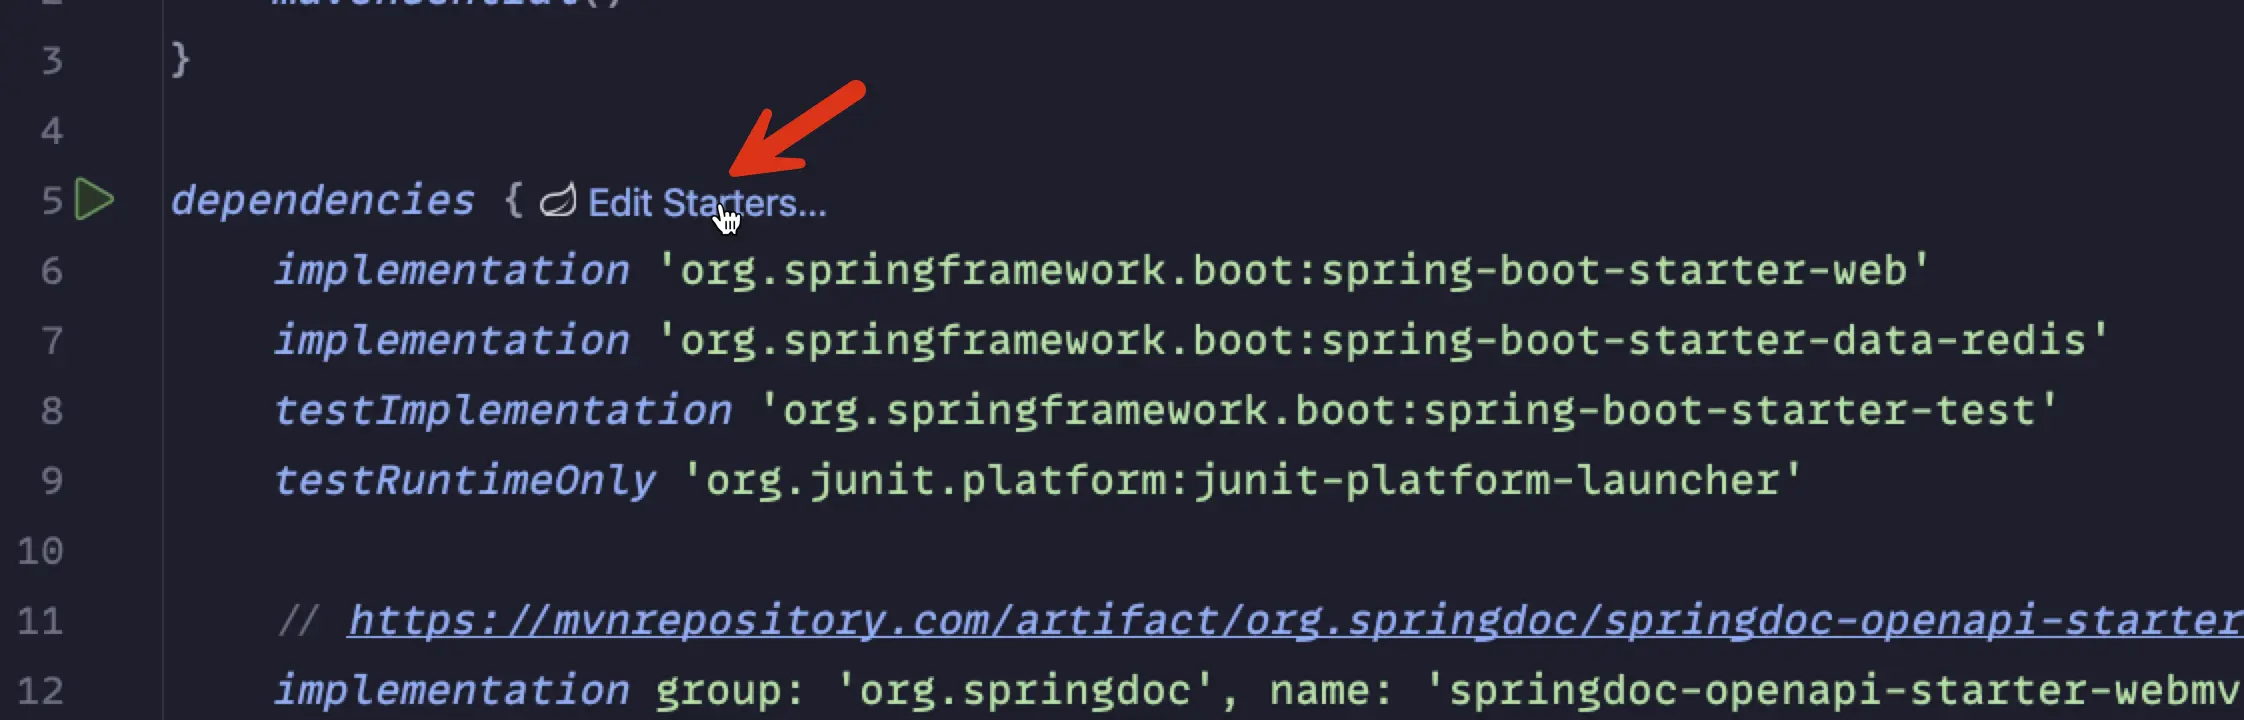
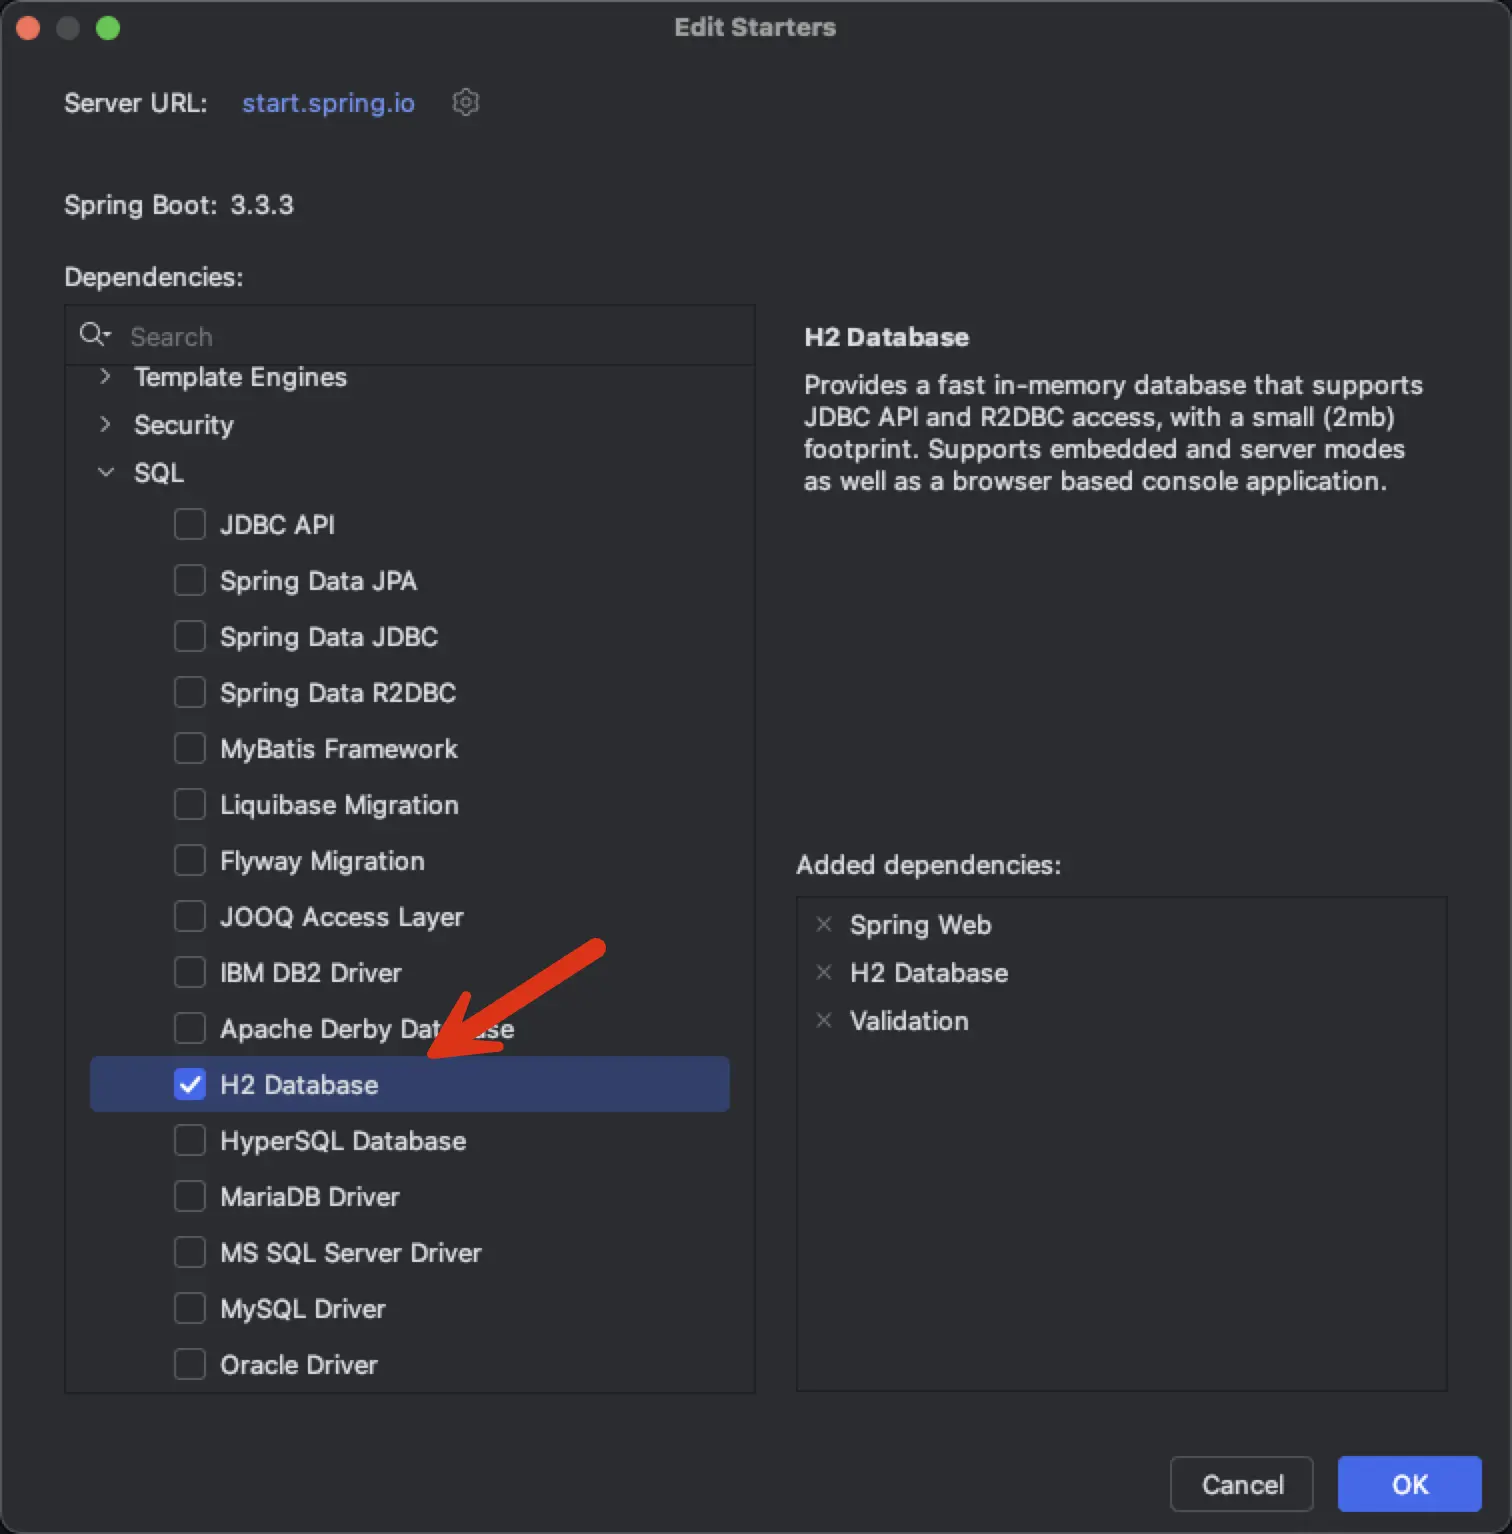
選完後,build.gradle 會自動幫我們新增相關的依賴
dependencies {
    runtimeOnly 'com.h2database:h2'
}
基本設定和 h2-console
可以在 application.properties 裡面先設定 console enabled ,就可以用 h2 的預設路徑 /h2-console 來瀏覽 DB
spring.h2.console.enabled=true
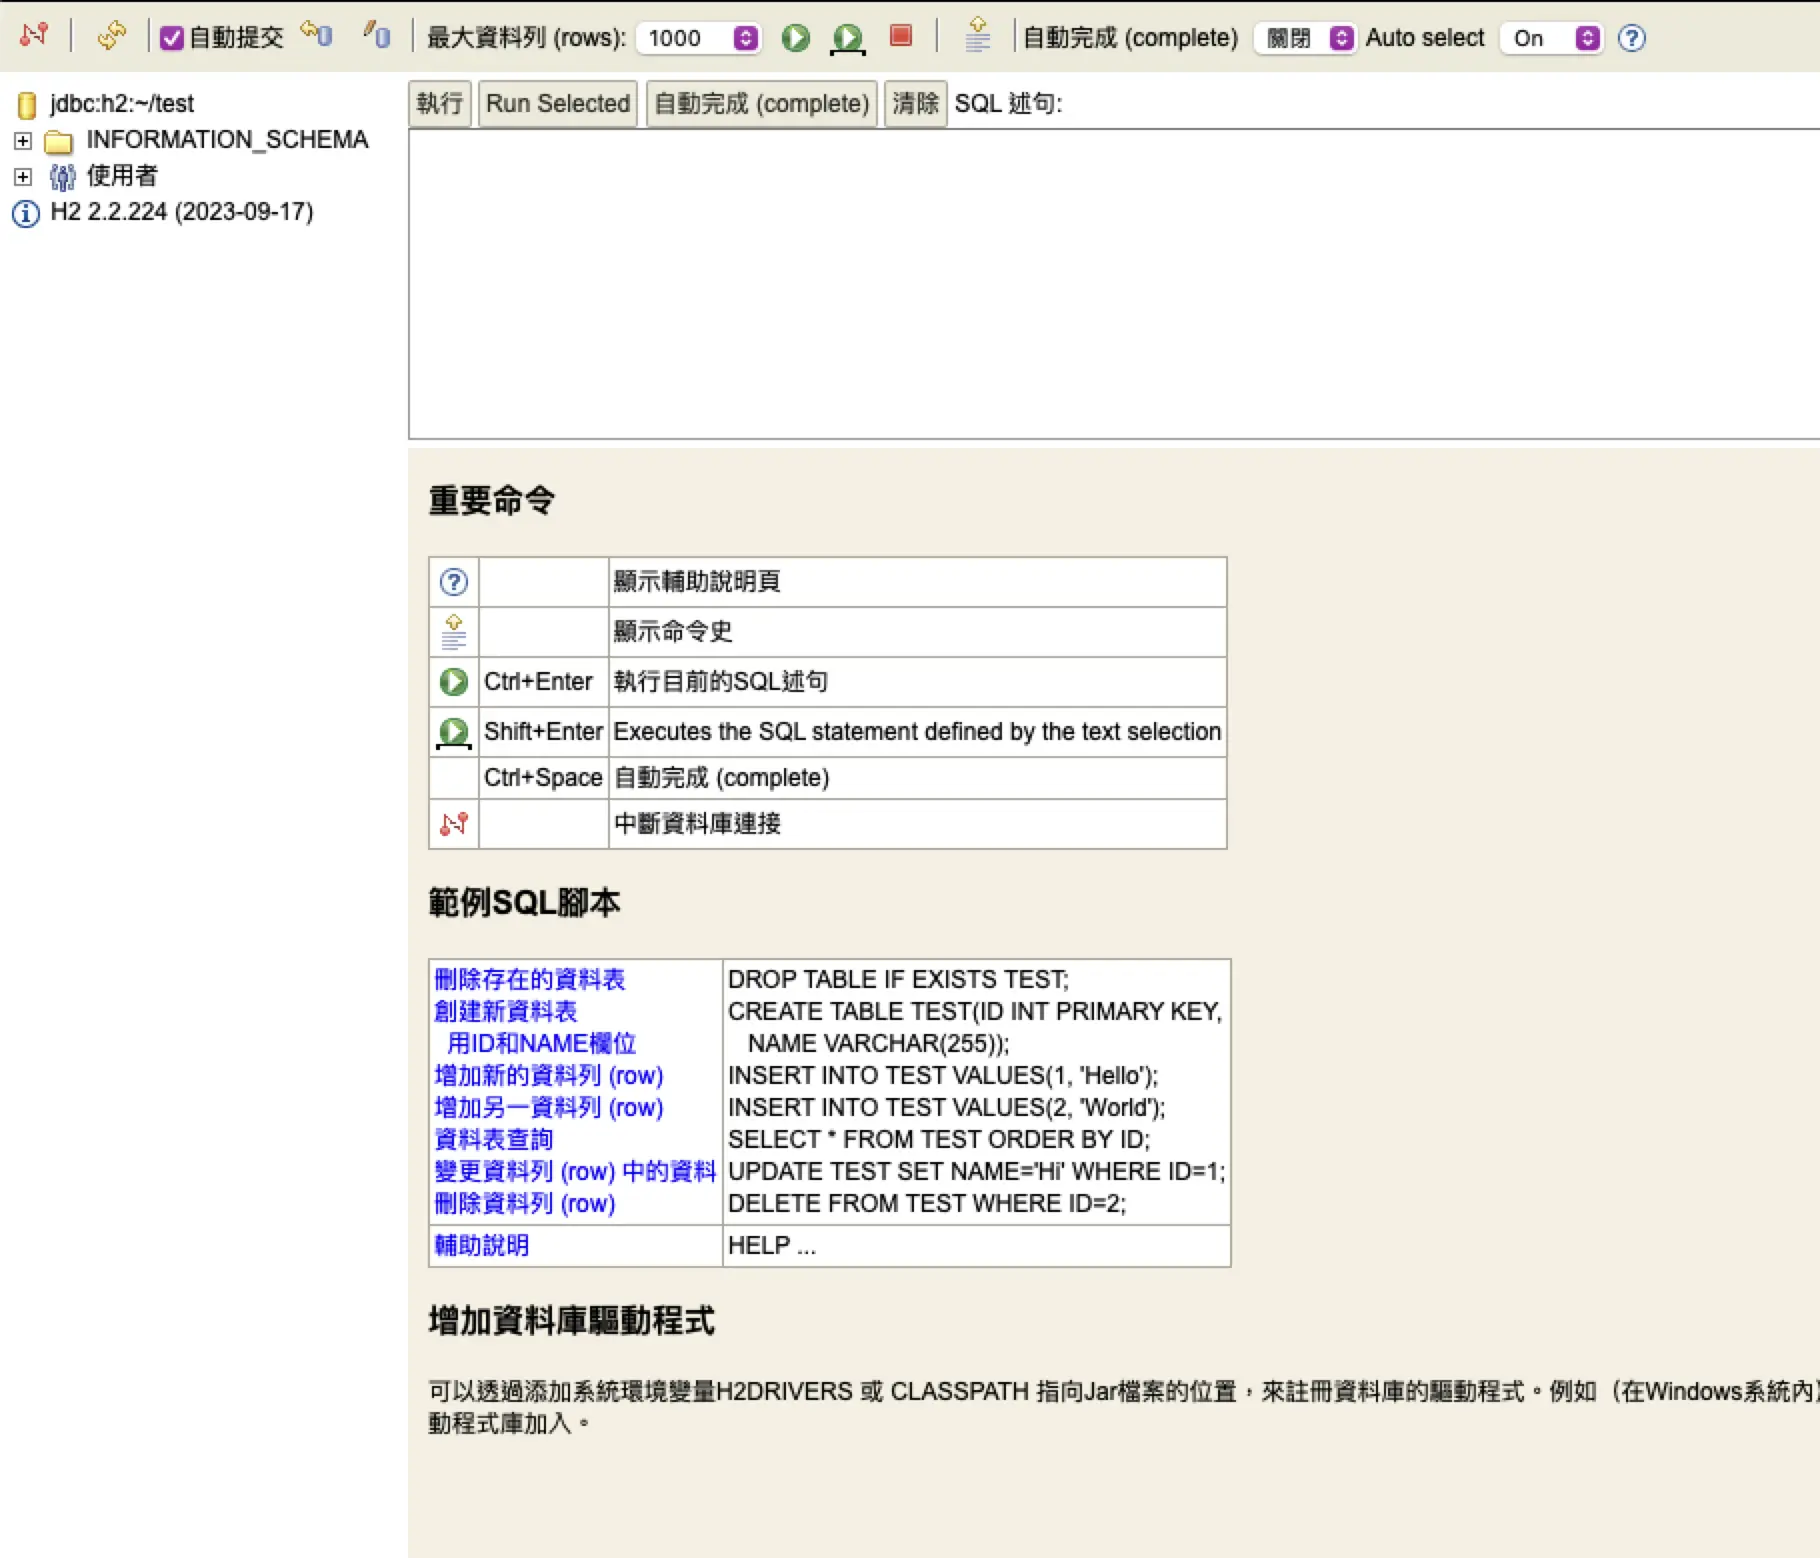
打開瀏覽器到 http://localhost:8080/h2-console/,就可以看到登入畫面了
左上角可以調整語系為 繁體中文
預設使用 jdbc:h2:~/test 就可以連接到 db,可以點 測試連結 確認是可以連結上的
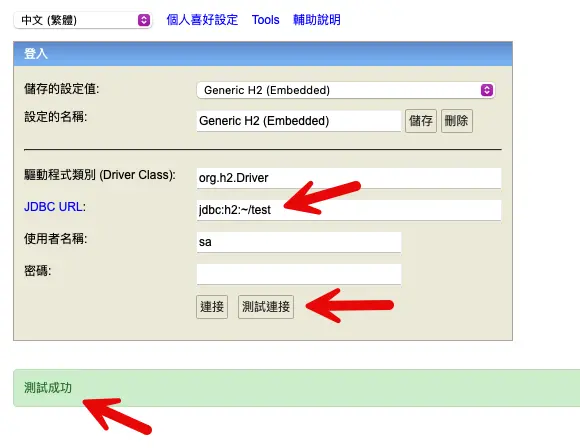
為了測試方便,這裡使用了 Embedded (Local) Database 的方式,它會將 test DB 檔案儲存在根目錄 ~/ 下
點連接的話,就會到預設的管理介面
修改程式碼
我們將之前的 TodoController,從使用 static List 改為使用 H2 資料庫
- 我們在建構子中初始化了資料庫,如果不存在的話,就建立一個 todos 的 table
- 這裡只用最基本的 Java SQL API 來操作 DB,可以看到需要寫非常多的程式碼,而且很麻煩
- 基本上現在很少會這樣子操作 DB,我們在後面的文章會慢慢的調整寫法
public class TodoController {

    // 為了方便,在這裡只展示了修改後,所增加的 DB 操作相關程式碼
    private static final String DB_URL = "jdbc:h2:~/test";
    private static final String DB_USER = "sa";
    private static final String DB_PASSWORD = "";

    public TodoController() {
        initDatabase();
    }

    private void initDatabase() {
        try (Connection conn = DriverManager.getConnection(DB_URL, DB_USER, DB_PASSWORD);
                Statement stmt = conn.createStatement()) {
            String sql = "CREATE TABLE IF NOT EXISTS todos " +
                    "(id BIGINT AUTO_INCREMENT PRIMARY KEY, " +
                    "title VARCHAR(255), " +
                    "completed BOOLEAN)";
            stmt.executeUpdate(sql);
        } catch (SQLException e) {
            logger.error("初始化資料庫失敗", e);
        }
    }

    @PostMapping
    public ResponseEntity<MyApiResponse<Todo>> createTodo(@RequestBody Todo todo) {

        try (Connection conn = DriverManager.getConnection(DB_URL, DB_USER, DB_PASSWORD);
                PreparedStatement pstmt = conn.prepareStatement(
                        "INSERT INTO todos (title, completed) VALUES (?, ?)",
                        Statement.RETURN_GENERATED_KEYS)) {

            pstmt.setString(1, todo.getTitle());
            pstmt.setBoolean(2, todo.isCompleted());
            pstmt.executeUpdate();

            try (ResultSet generatedKeys = pstmt.getGeneratedKeys()) {
                if (generatedKeys.next()) {
                    todo.setId(generatedKeys.getLong(1));
                }
            }

            return ResponseEntity.ok(new MyApiResponse<>(true, todo, null));
        } catch (SQLException e) {
            return ...
        }
    }

    @GetMapping
    public ResponseEntity<MyApiResponse<List<Todo>>> getAllTodos() {

        List<Todo> todos = new ArrayList<>();
        try (Connection conn = DriverManager.getConnection(DB_URL, DB_USER, DB_PASSWORD);
                Statement stmt = conn.createStatement();
                ResultSet rs = stmt.executeQuery("SELECT * FROM todos")) {

            while (rs.next()) {
                Todo todo = new Todo();
                todo.setId(rs.getLong("id"));
                todo.setTitle(rs.getString("title"));
                todo.setCompleted(rs.getBoolean("completed"));
                todos.add(todo);
            }

            return ResponseEntity.ok(new MyApiResponse<>(true, todos, null));
        } catch (SQLException e) {
            return ...
        }
    }

    @GetMapping("/{id}")
    public ResponseEntity<MyApiResponse<Todo>> getTodo(@PathVariable Long id) {

        try (Connection conn = DriverManager.getConnection(DB_URL, DB_USER, DB_PASSWORD);
                PreparedStatement pstmt = conn.prepareStatement("SELECT * FROM todos WHERE id = ?")) {

            pstmt.setLong(1, id);
            try (ResultSet rs = pstmt.executeQuery()) {
                if (rs.next()) {
                    Todo todo = new Todo();
                    todo.setId(rs.getLong("id"));
                    todo.setTitle(rs.getString("title"));
                    todo.setCompleted(rs.getBoolean("completed"));
                    return ResponseEntity.ok(new MyApiResponse<>(true, todo, null));
                } else {
                    throw new TodoNotFoundException(id);
                }
            }
        } catch (SQLException e) {
            return ...
        }
    }

    @PutMapping("/{id}")
    public ResponseEntity<MyApiResponse<Todo>> updateTodo(@PathVariable Long id, @RequestBody Todo updatedTodo) {

        try (Connection conn = DriverManager.getConnection(DB_URL, DB_USER, DB_PASSWORD);
                PreparedStatement pstmt = conn.prepareStatement(
                        "UPDATE todos SET title = ?, completed = ? WHERE id = ?")) {

            pstmt.setString(1, updatedTodo.getTitle());
            pstmt.setBoolean(2, updatedTodo.isCompleted());
            pstmt.setLong(3, id);

            int affectedRows = pstmt.executeUpdate();
            if (affectedRows > 0) {
                updatedTodo.setId(id);
                return ResponseEntity.ok(new MyApiResponse<>(true, updatedTodo, null));
            } else {
                return createNotFoundError(id);
            }
        } catch (SQLException e) {
            return ...
        }
    }

    @DeleteMapping("/{id}")
    public ResponseEntity<MyApiResponse<Todo>> deleteTodo(@PathVariable Long id) {

        try (Connection conn = DriverManager.getConnection(DB_URL, DB_USER, DB_PASSWORD);
                PreparedStatement pstmt = conn.prepareStatement("DELETE FROM todos WHERE id = ?")) {

            pstmt.setLong(1, id);
            int affectedRows = pstmt.executeUpdate();

            if (affectedRows > 0) {
                return ResponseEntity.ok(new MyApiResponse<>(true, null, null));
            } else {
                return createNotFoundError(id);
            }
        } catch (SQLException e) {
            return ...
        }
    }
}
測試 API
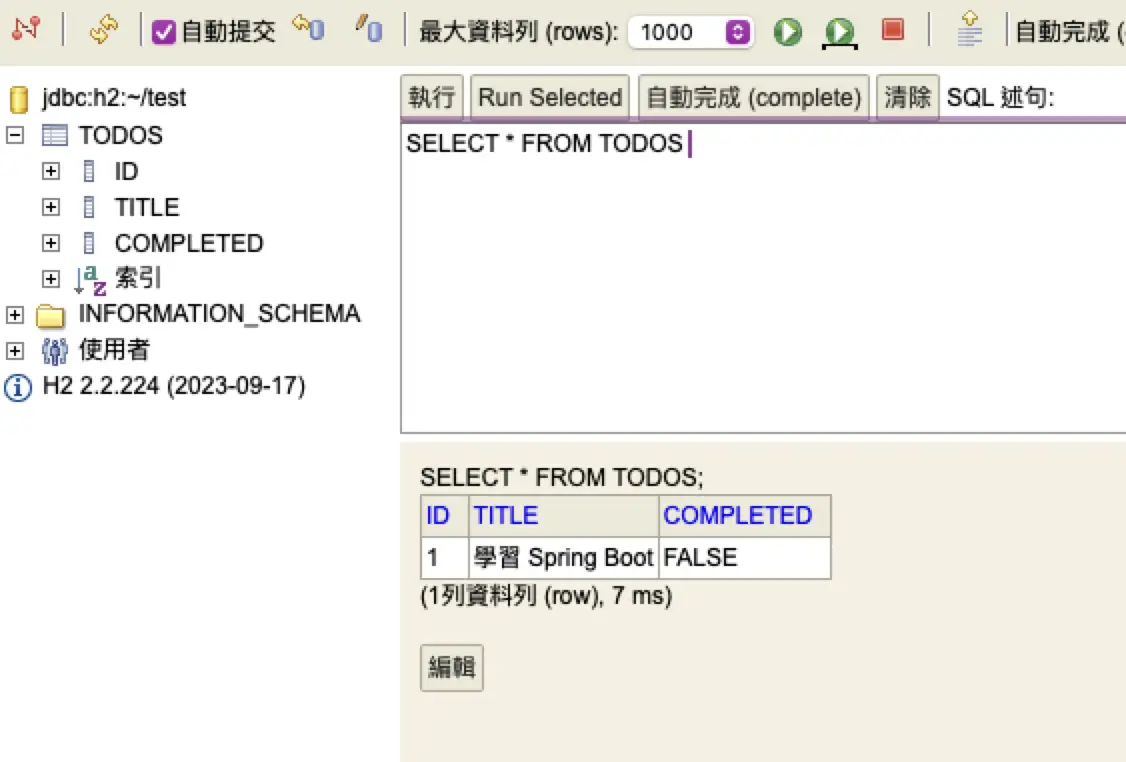
使用之前的 api-test.http 來測試相關的 CRUD,應該可以看到返回的訊息都跟之前一樣,沒有什麼問題
也可以使用 /h2-console 來看一下資料有沒有正確寫入
H2 資料庫配置
Spring Boot 提供了許多配置選項來自定義 H2 資料庫的行為
以下是一些常用的配置項,可以在 application.properties 中設置
基本上這些設定就是在使用 h2-console 的時候會用到的
# 啟用 H2 控制台
spring.h2.console.enabled=true

# 資料庫 URL
spring.datasource.url=jdbc:h2:~/test

# 驅動程式類別名稱
spring.datasource.driver-class-name=org.h2.Driver

# 資料庫用戶名
spring.datasource.username=sa

# 資料庫密碼
spring.datasource.password=

# H2 控制台路徑
spring.h2.console.path=/h2-console
自動建立資料庫表
將初始化資料庫的相關動作寫在某個控制器的建構子中,是還蠻奇怪的,下面就來看可以怎麼修改
使用 schema.sql 文件
注意,使用此方法的的話,需要安裝 JDBC 的 starter 才可以啟用自動執行,如果不想安裝的話,可以參考下一個方法
implementation 'org.springframework.boot:spring-boot-starter-jdbc'
在 src/main/resources 目錄下建立一個 schema.sql 文件:
CREATE TABLE IF NOT EXISTS todos (
    id BIGINT AUTO_INCREMENT PRIMARY KEY,
    title VARCHAR(255) NOT NULL,
    completed BOOLEAN NOT NULL
);
然後在 application.properties 中添加以下配置:
# 表示每次應用程式啟動時都會執行初始化的 script
spring.sql.init.mode=always

# 指定了資料庫 schema 初始化 script 的位置
spring.sql.init.schema-locations=classpath:schema.sql
測試之前,記得先把原本寫在 TodoController 裡面的 initDatabase 刪除
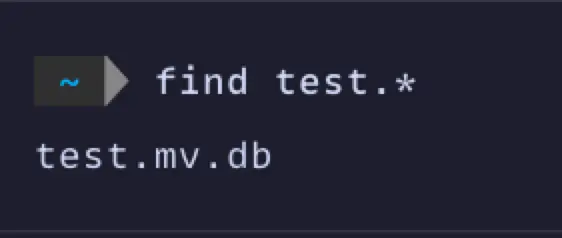
如果在根目錄下面已經有
test.mv.db的話,可以先砍掉
使用 @PostConstruct 註解
另一種方法是使用 @PostConstruct 註解,允許你在程式碼中動態生成 SQL,在應用程式啟動時執行 SQL script
建立一個新的類別 DatabaseInitializer
@Component
public class DatabaseInitializer {
@PostConstruct
public void initDatabase() {
String url = "jdbc:h2:~/test";
String user = "sa";
String password = "";
String sql = "CREATE TABLE IF NOT EXISTS todos (" +
"id BIGINT AUTO_INCREMENT PRIMARY KEY," +
"title VARCHAR(255) NOT NULL," +
"completed BOOLEAN NOT NULL)";
try (Connection conn = DriverManager.getConnection(url, user, password);
Statement stmt = conn.createStatement()) {
stmt.execute(sql);
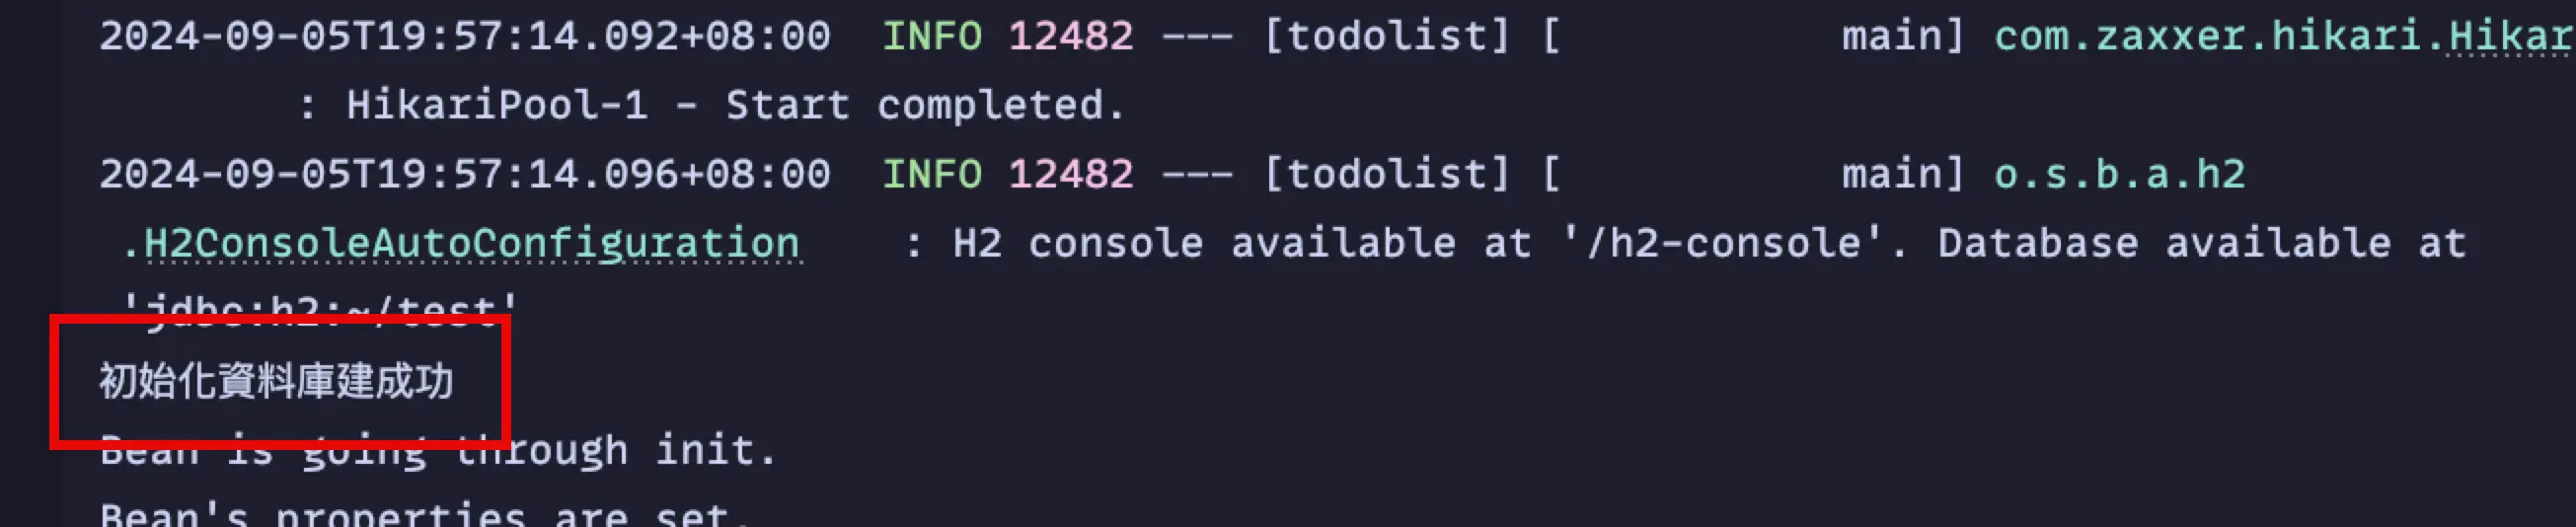
System.out.println("初始化資料庫建立成功");
} catch (Exception e) {
System.err.println("初始化資料庫失敗:" + e.getMessage());
}
}
}
這個類別會在 Spring 容器初始化後自動執行 initDatabase 方法,確保 todos 被建立
另外,可以看到 log 裡面也有成功的訊息
實務上的話,會使用 flyway 或是 liquibase 這種專門的工具來管理 DB 的 schema 變化
結論
通過使用 H2 資料庫,並結合自動化的資料庫初始化,我們可以快速建立一個具有資料庫功能的原型應用
這種方法不僅簡化了開發過程,還為後續的擴展和優化提供了良好的基礎
無論是用於學習、測試還是快速驗證想法,這種設置都能提供一個輕量且功能完備的開發環境
同步刊登於 iTHome 鐵人賽 「Spring Boot API 開發:從 0 到 1」Day 17 Spring Boot 與 H2 資料庫
圖片來源:AI 產生